Setting up Eduframe and Brightspace connection
Last updated: October 16, 2026
Summary
This article explains step by step how to set up the connection between Eduframe and Brightspace, Single Sign On (SSO) and the grade export in Brightspace.
Note: Drieam makes the Brightspace plugin, the tab 'Brightspace' on course editions and the 'Go to Course' button in the participant portal available in your Eduframe environment. Contact your Drieam consultant before you start.
How to set up your Brightspace integration? [Brightspace part]
The first step is giving Eduframe access to Brightspace. Your Brightspace environment must be on LMS version 20.26.7 or later.
To give Eduframe access, follow the steps below as a Brightspace administrator:
Create a Service User in Brightspace. Eduframe uses this user to make its changes in Brightspace.
Go to Admin Tools > Manage Extensibility and register an OAuth 2.0 app for the Service User.
Fill in the following information:
JWKS URL:
https://brightspace.eduframe.nl/jwksScopes: copy paste the scopes below.
core:*:*organizations:organization:create,delete,readorganizations:organizationtypes:readorgunits:course:create,update,deleteorgunits:coursetemplate:create,updaterole:detail:readcalendar:events:read,write,deleteusers:userdata:create,read,update,deleteusers:merge:createenrollment:orgunit:create,read,deletegrades:gradevalues:read
Save the app and copy its Client ID. You need it in the Eduframe part.
Give the Service User the permissions to manage the roles you want to give participants and teachers. Eduframe only shows the roles the Service User is allowed to manage.
Note: Eduframe does not use a client secret. Brightspace checks the requests of Eduframe with the JWKS URL.
Also check that the departments and roles you want to use exist in Brightspace. Eduframe links to them, but does not create them.
How to set up your Brightspace integration? [Eduframe part]
The second series of steps have to be executed in Eduframe. Use a technical user for this: a separate Eduframe admin account that is only used for this integration. The integration makes its changes in Eduframe with this account.
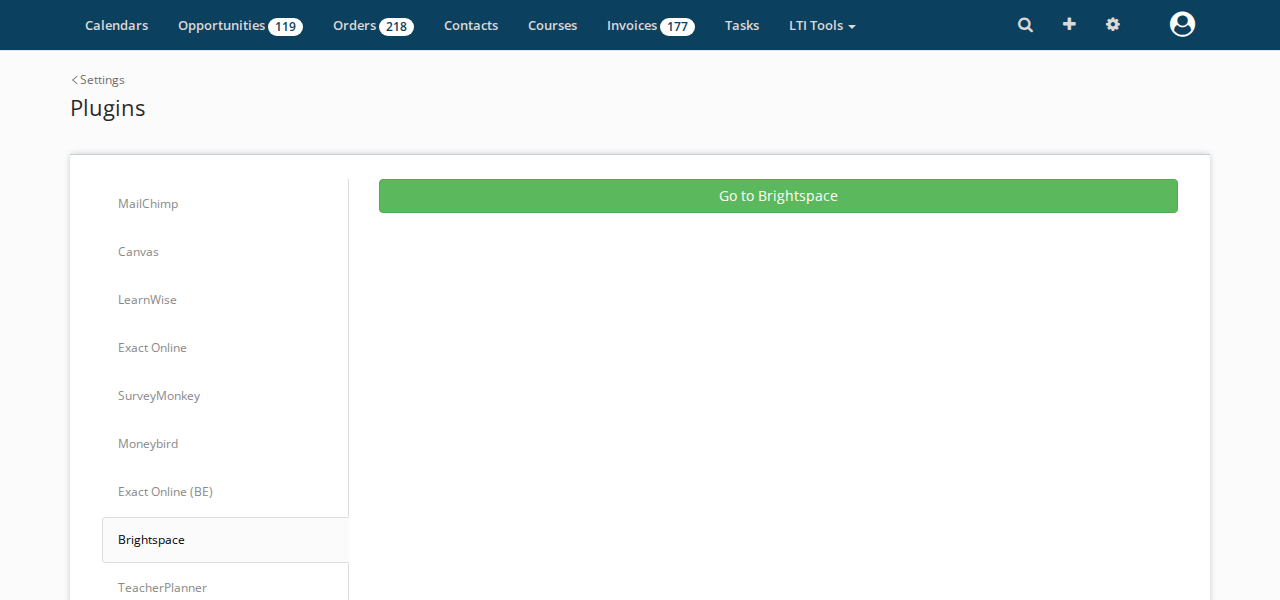
1. Log in to Eduframe with the technical user and go to 'Settings' > 'Plugins' > 'Brightspace'. Click on 'Go to Brightspace'.
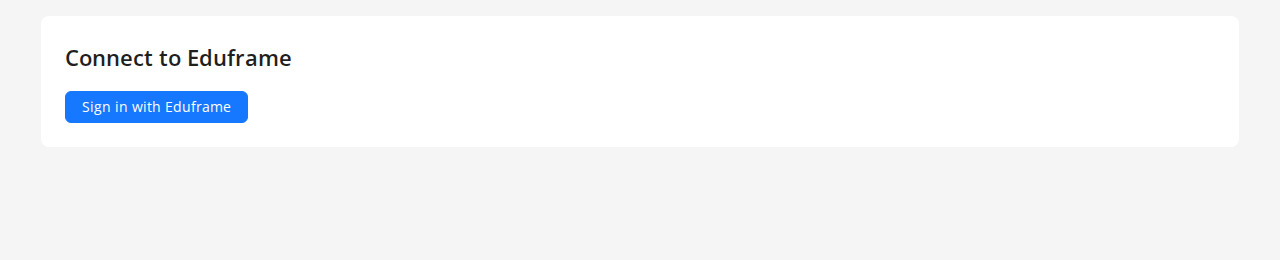
2. Click on 'Sign in with Eduframe'.
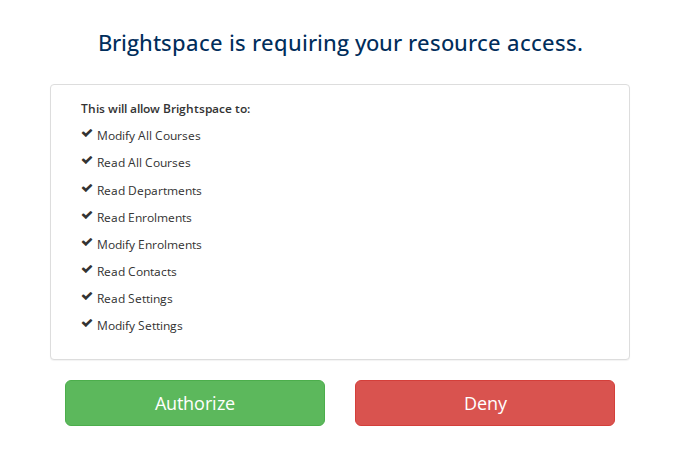
3. Eduframe shows what the integration may do. Click on 'Authorize'.
4. The integration opens 'Eduframe credentials'. Click on 'Use my access token'.
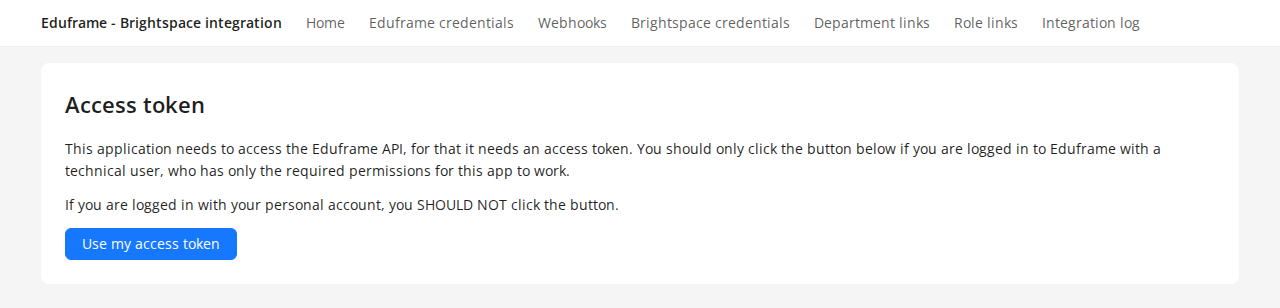
Note: Only click on 'Use my access token' when you are logged in with the technical user. Never do this with your personal account.
5. Go to 'Webhooks' and click on 'Register webhook' ('Update registration' when it was registered before). Eduframe now informs the integration about changes.
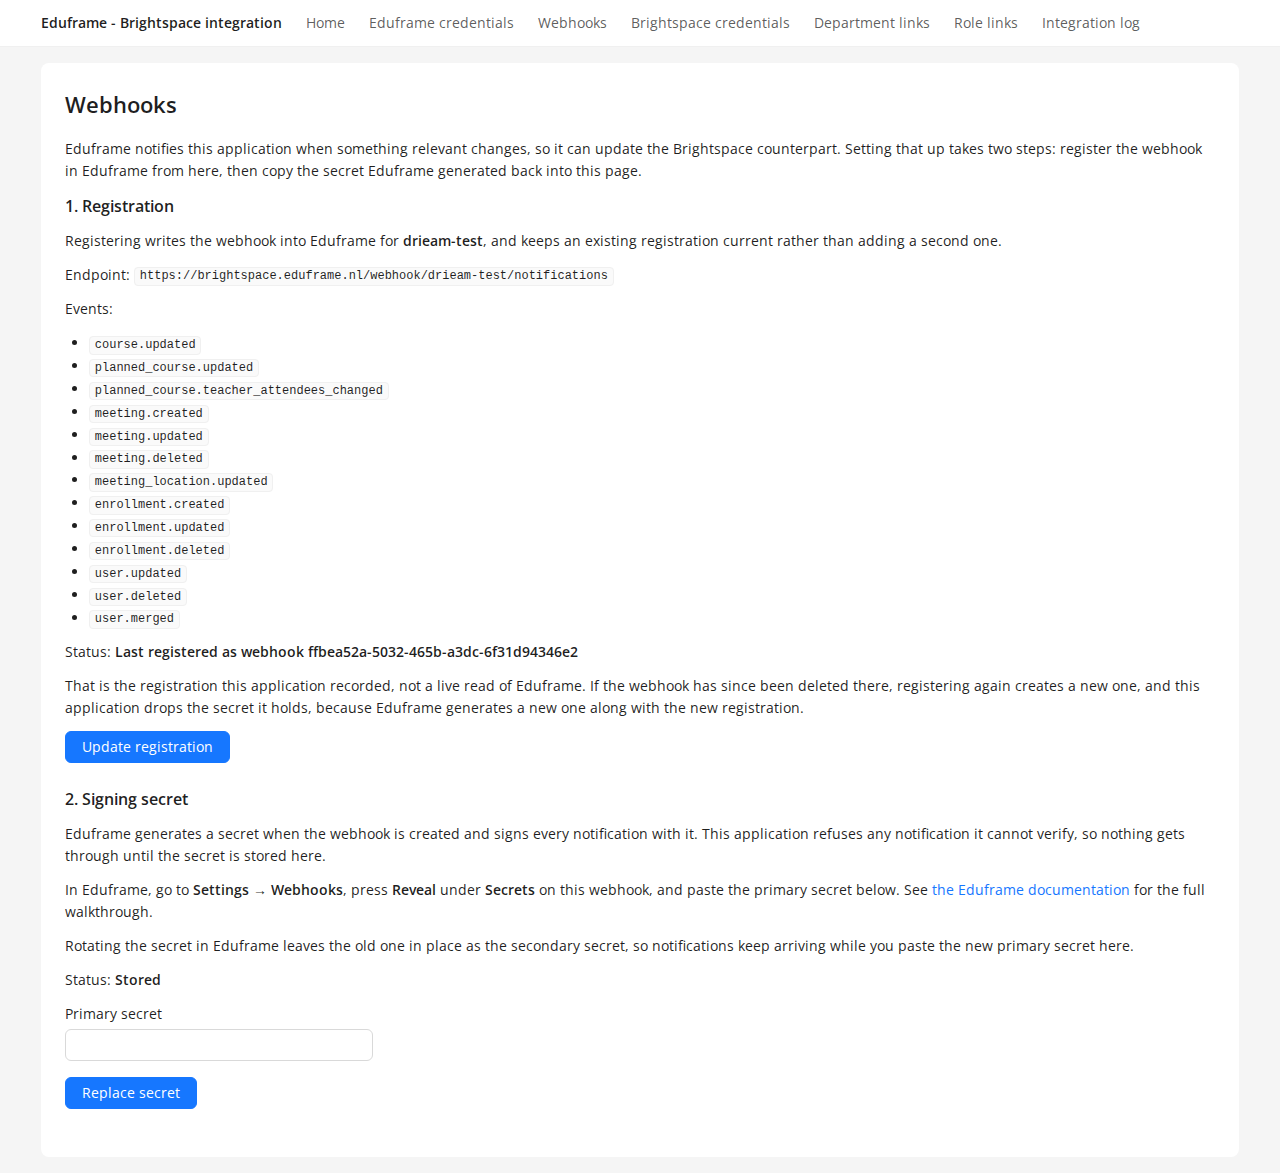
6. Open Eduframe in a separate tab and go to 'Settings' > 'Webhooks'. Click on 'Reveal' at the webhook that starts with https://brightspace.eduframe.nl and copy the primary secret.

7. Go back to 'Webhooks' in the integration, paste the secret in 'Primary secret' and click on 'Save secret' ('Replace secret' when a secret was saved before). Until the secret is saved, no changes are sent to Brightspace.
8. Go to 'Brightspace credentials'. Fill in the 'Client ID' of the OAuth 2.0 app and, as 'Instance URL', the URL of your Brightspace environment, for example https://yourinstitution.brightspace.com. Click on 'Save'.
9. Click on 'Test connection'. The status must be 'Connected'.
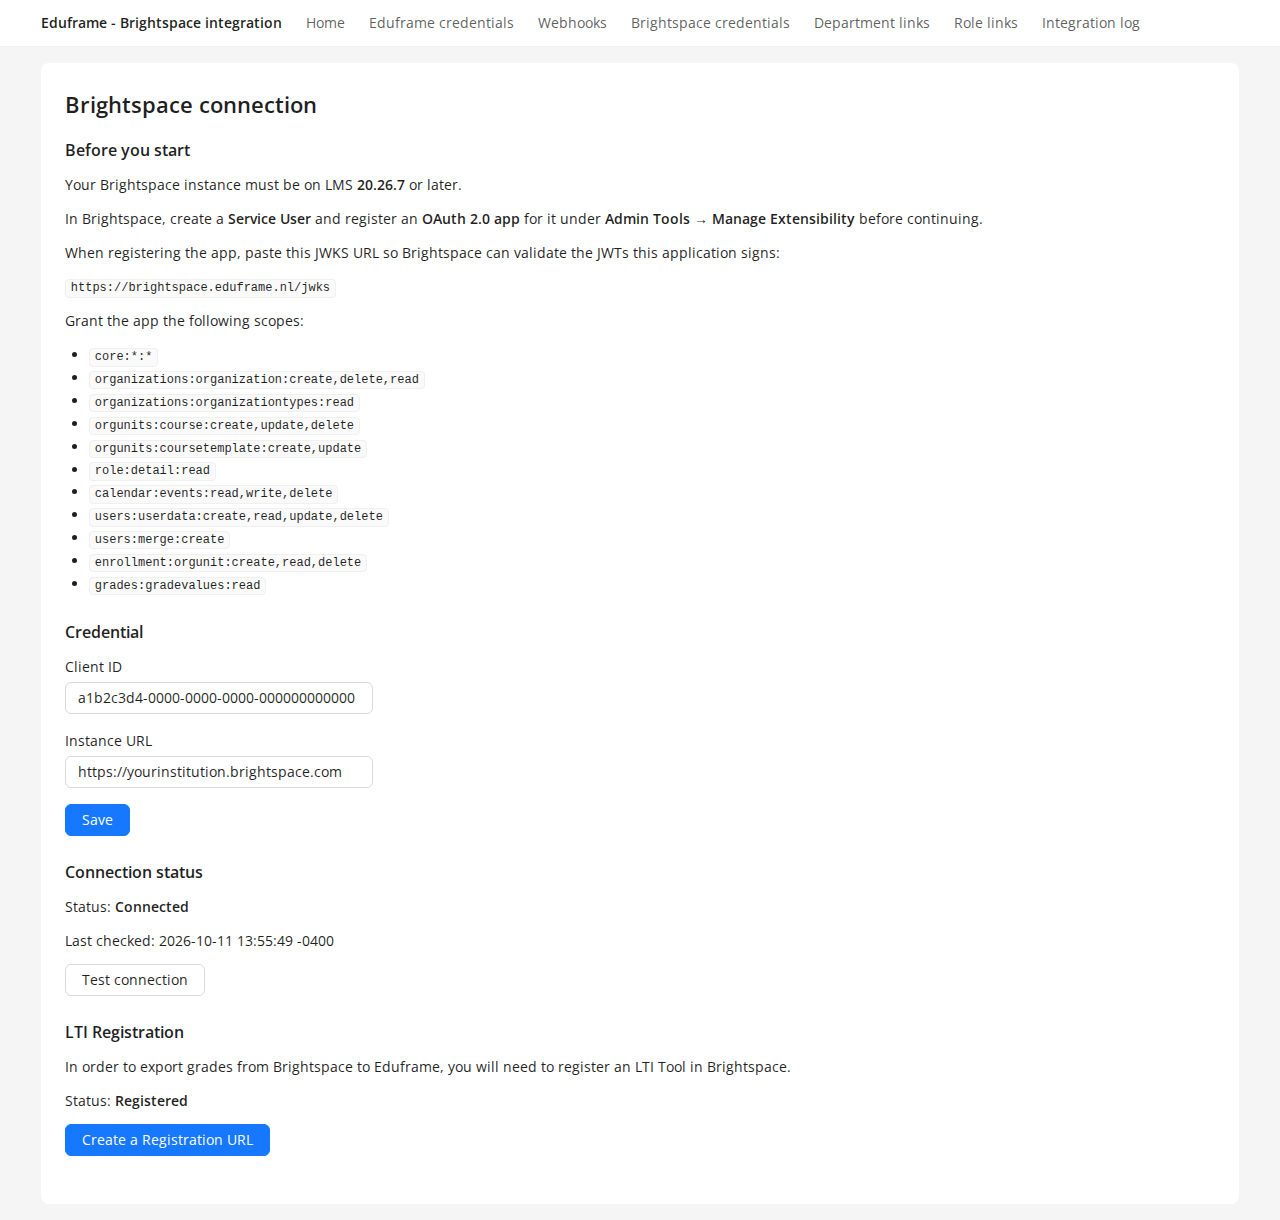
10. Link the departments in 'Department links' and set the roles in 'Role links'. You can read how in 📄 Brightspace - Integration.
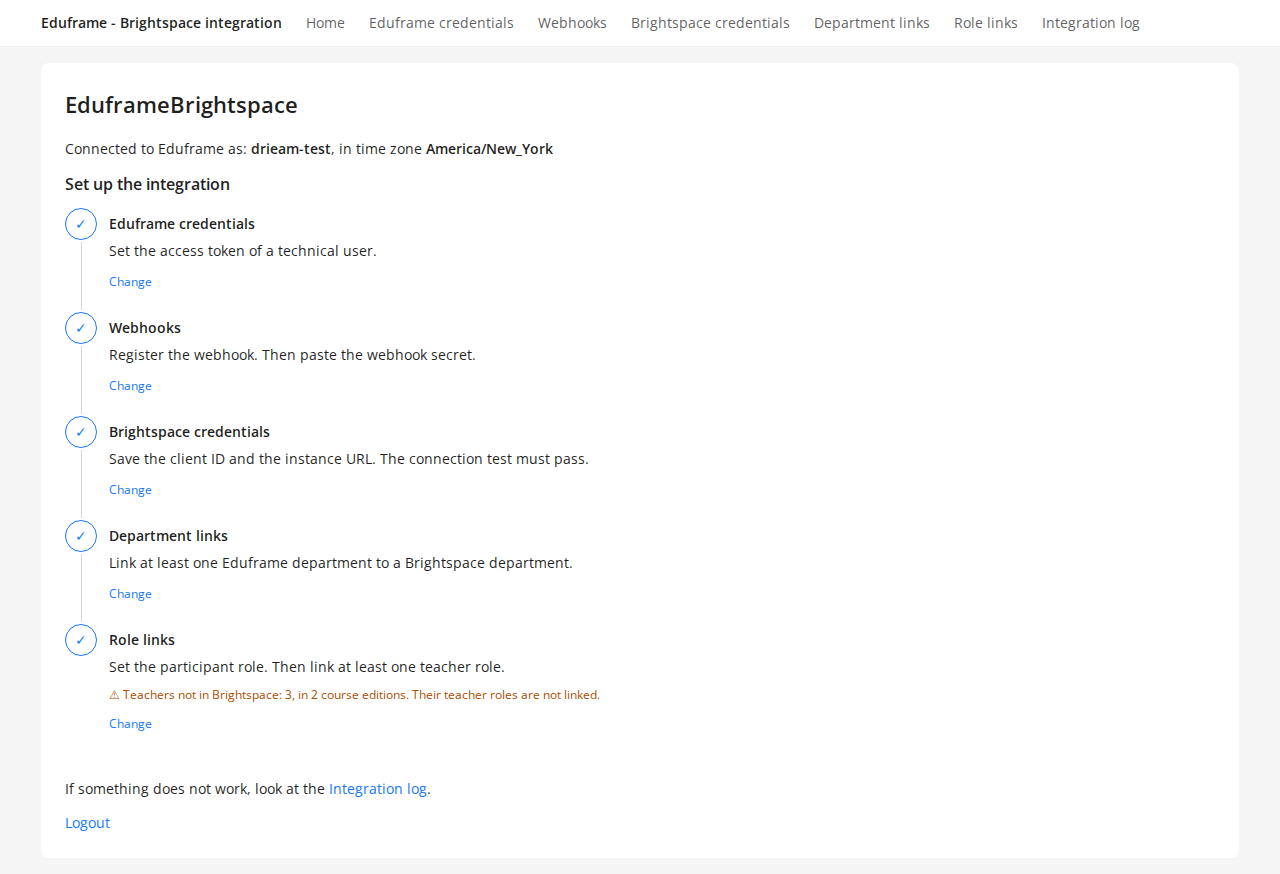
When all steps on the home page have a checkmark, your Brightspace integration is set up. A warning under a step tells you what still needs your attention.
How to set up the grade export in Brightspace?
Participants' final grades are exported from Brightspace with the Eduframe tool in Brightspace. To add the tool to Brightspace:
In the integration, go to 'Brightspace credentials' and click on 'Create a Registration URL' under 'LTI Registration'. Copy the URL: it is shown only once, works for one hour and can be used once.
In Brightspace, go to Admin Tools > Manage Extensibility > LTI Advantage and register a tool with Dynamic registration. Paste the Registration URL as the registration endpoint. Brightspace shows 'Registration complete' and adds the tool 'Eduframe Brightspace'.
Enable the new registration. Brightspace leaves it disabled.
Share the deployment of the tool with the organization's descendants too, otherwise opening the tool from a course fails.
Add the tool to the navigation bar of the course offerings: go to Navigation & Themes, open the navbar and click on Add links > Create custom link > Insert quicklink > External learning tools, and select the tool.
In 'Brightspace credentials' the status under 'LTI Registration' is now 'Registered'.
Note: Learners also see the tool in the navigation bar, but only instructors and administrators can export grades with it.
How to set up Single Sign On (SSO) Eduframe within Brightspace?
As part of the connection between Eduframe and Brightspace, you can set up a Single Sign On (SSO). This means that the credentials created for Eduframe will also be used for logging in to Brightspace. The set up will be done within the implementation together with a Drieam consultant.
To connect the Eduframe login to Brightspace, CAS is set up as the primary login method in Brightspace:
CAS URL: https://xxx.eduframe.nl/cas/ (xxx is the name of the educator)
CAS is set up in Brightspace together with D2L.
When a user logs in, Eduframe tells Brightspace the Principal ID of the contact. Brightspace then logs the user in to the Brightspace user with that username: the user Eduframe created for the contact. Find out more on the 📄 Principal ID.
Note: Eduframe creates Brightspace users without a password and without an e-mail address, and does not send them an e-mail. Users log in with their Eduframe login.
Users that already exist in Brightspace, for example created by your SIS, are used by Eduframe when their Org Defined ID is the Principal ID of the contact.
Note: Turn on Manage externally for contacts whose Brightspace user is managed by another system, such as your SIS. Otherwise Eduframe overwrites their username, clears their e-mail address and, when the contact is deleted in Eduframe, deletes the Brightspace user with all its enrollments, also in courses that were not published from Eduframe.