Setting up Eduframe and Canvas LMS connection
Last updated: September 1, 2026
Summary
This article explains step by step how to set up a successful connection between Eduframe and Canvas and Single Sign On (SSO).
How to set up your Canvas integration? [Canvas part]
The first step in setting up the integration between Eduframe and Canvas is creating a developer key in Canvas. It is advised to perform the following steps using a technical user since we will later authorize Eduframe using this technical user in Canvas.
To create a developer key in Canvas follow the steps below:
Log into Canvas as a root account admin.
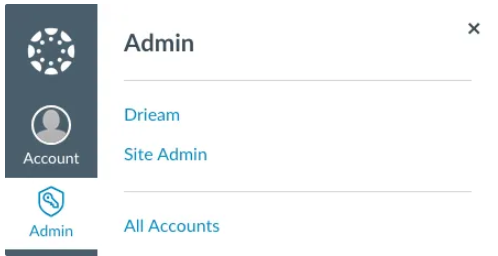
Click on Admin > Site Admin
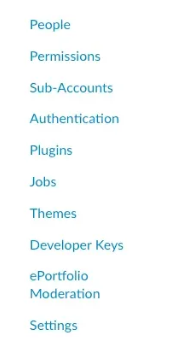
Then open the Developer Keys tab
Click on “+ Developer Key” and then “+ API Key”. This will open the creation page for a new developer API key.
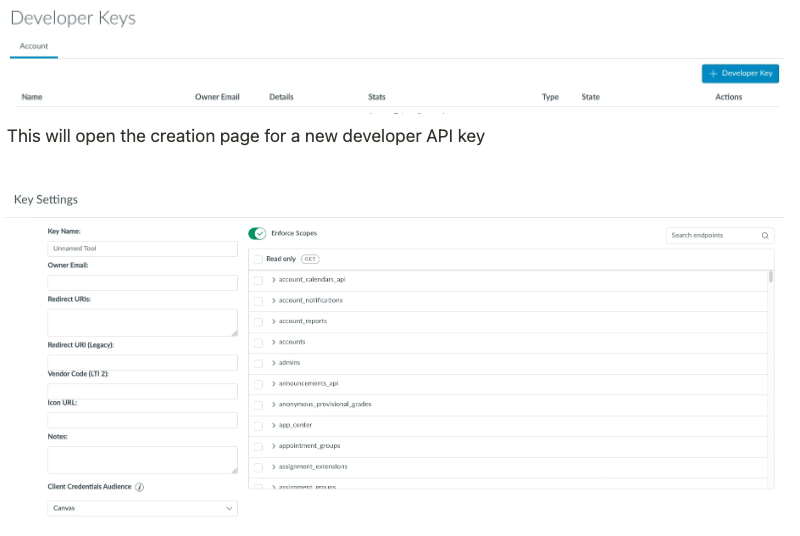
On this page, the following information needs to be filled:
Key Name: This is the name of the developer key, you are creating. It is advised to have Eduframe in the name so later you can easily identify this key.
Redirect URIs: https://redirect.eduframe.nl/canvas/oauth2/callback
Client Credentials Audience: Canvas
Enforce scopes: Enabled
Methods: Select Paste scopes to easily copy paste the scopes below.
url:POST|/api/v1/courses/:course_id/calendar_events/timetable_events
url:POST|/api/v1/courses/:course_id/enrollments
url:POST|/api/v1/accounts/:account_id/sis_imports
url:GET|/api/v1/accounts/:account_id/sis_imports
url:GET|/api/v1/accounts/:account_id/sis_imports/:id
url:PUT|/api/v1/accounts/:account_id/sis_imports/:id/abort
url:POST|/api/v1/accounts/:account_id/users
url:GET|/api/v1/users/:id
url:PUT|/api/v1/users/:id/merge_into/:destination_user_id
url:PUT|/api/v1/users/:user_id/custom_data(/*scope)
url:DELETE|/api/v1/users/:user_id/custom_data(/*scope)
url:GET|/api/v1/users/:user_id/logins
url:DELETE|/api/v1/users/:user_id/logins/:id
After all the above information and scopes have been entered, click on save to create the developer key.
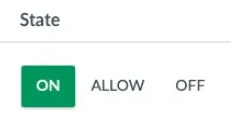
Enable the just created developer key:
How to set up your Canvas integration? [Eduframe part]
The second series of steps have to be executed in Eduframe:
1. In Eduframe, go to 'Settings' > 'Plugins' > 'Canvas', which will open the settings page of the Canvas integration.
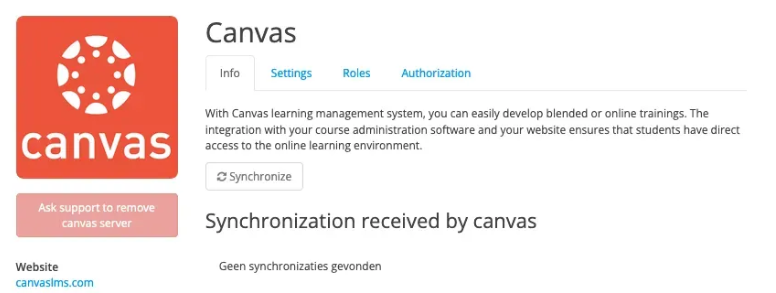
2. Open the Authorization tab, which will open the authorization settings of your Canvas integration. In this tab, you will be able to update the credentials needed to integrate Eduframe with Canvas.
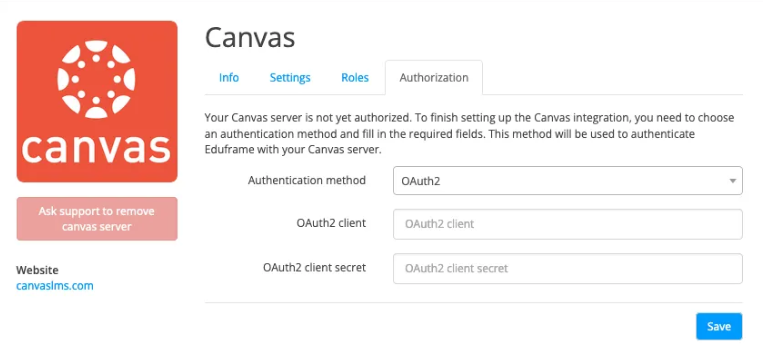
3. In this view, you need to choose which authentication method Eduframe should use to communicate with your Canvas server. Here you should choose the OAuth2 method as the Access token method is deprecated and should no longer be used.
4. Fill the OAuth2 client with the ID shown in Canvas of the created developer key (10000000000089 in example) in the image.

5. Fill in the OAuth2 client secret with the secret that appears in the tooltip when pressing show key (in Canvas).

6. Click save to store these credentials.
7. Go back to the Authorization tab in Eduframe.
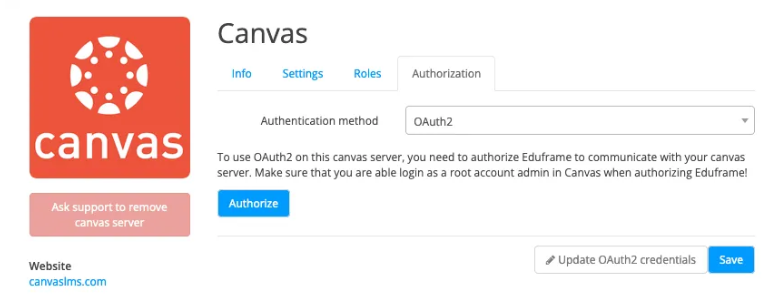
8. Click the Authorize button to start the authorization process with Canvas. In Canvas you will see a screen similar to the screen below:
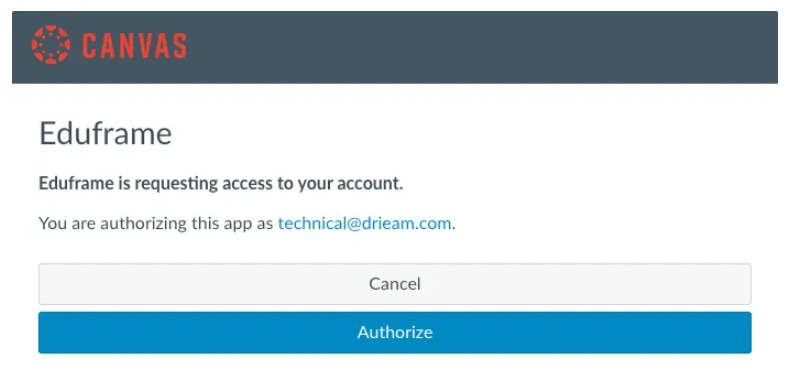
9. Click Authorize here as well.
If everything went successfully, you will be redirected back to Eduframe. Your Canvas server has been authorized and your Canvas integration is set up.
How to set up Single Sign On (SSO) Eduframe within Canvas?
As part of the connection between Eduframe and Canvas, you can set up a Single Sign On (SSO). This means that the credentials created for Eduframe will also be used for logging in for Canvas. The set up will be done within the implementation together with a Drieam consultant.
To connect the Eduframe login to Canvas via CAS, you go to Canvas as a root account admin and follow these steps:
Admin (from educator’s organization) from root account Canvas goes to: ADMIN
Go to root account under ADMIN button
In the account navigation, click Authentication
Select CAS and the following screen appears:
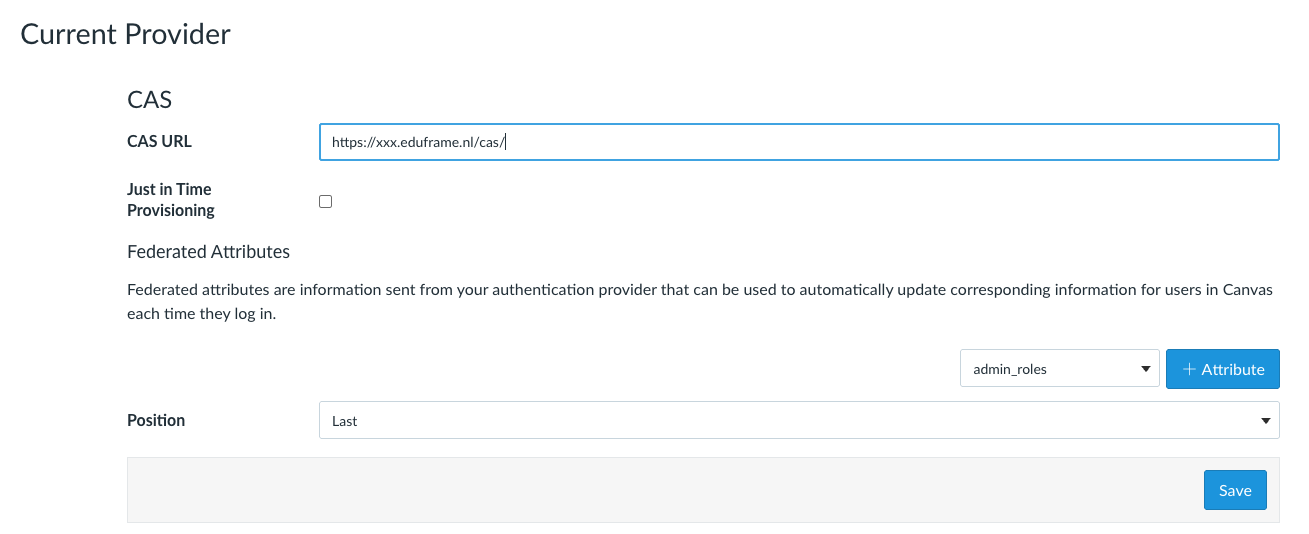
Fill URL: [https://xxx.eduframe.nl/cas/] (xxx is name of educator)
Uncheck the box ‘just in time provisioning’
Click ‘Save’
Eduframe login is now connected to Canvas
Notes:
- Check that the CAS position is on 1 if you want to Eduframe SSO to be the first login screen for users when they go to [educatorname].instructure.com
- There is always the possibility to login via the following URL with your Canvas login: [educatorname].instructure.com/login/canvas
- When there are more than 2 logins (e.g. SAML or another CAS), you might need a HTML frontpage to choose which login you want. We can connect the HTML frontpage in Canvas (redirect URL). Frontpage is the responsibility of the customer.