What are the different Payment Options in Eduframe?
Last updated: July 31, 2026
Summary
In Eduframe, there are various ways to setup your payment processes. Find out more about the possibilities in this article.
Which Payment Methods does Eduframe support?
Eduframe offers a variety of payment methods to provide flexibility for both your administration and your participants. Here is a breakdown of how each option functions:
1. Online Payment Provider
This is the most automated way to collect payments. Eduframe integrates with providers like 📄 Online Payment: Mollie, 📄 Online Payment: Stripe Checkout and 📄 Online Payment: Authorize.netto handle transactions securely.
How it works: During checkout, the participant is redirected to a secure, hosted page provided by the payment service (e.g., to pay via Credit Card, PayPal, or iDEAL).
The benefit: Once the payment is completed, Eduframe receives an automatic notification (webhook) and immediately updates the invoice status to "Paid." You never have to handle sensitive card data yourself.
The Process:
Registration completed
Order created
Draft invoice generated
Participant redirected to the hosted payment page.
Success: Once payment is confirmed, the invoice status automatically updates to Paid.
Automation: You can configure Eduframe to automatically accept orders once a successful online payment is received (Setting payment options)
Failures: If a payment fails or is not paid, the invoice remains as a "concept" and administrators can manually send a new payment request link via email.
All Payment Providers can be found in our knowledge base section Integrations.
2. On Invoice (Manual)
This option is ideal for B2B transactions or customers who prefer traditional bank transfers.
How it works: Instead of paying immediately online, the participant completes their enrollment and receives a digital invoice via email. They then arrange the payment through their own banking portal or accounting department.
The benefit: It provides flexibility for corporate clients who require an invoice before they can release funds. An administrator manually marks the invoice as "Paid" in Eduframe once the funds are received in your bank account.
The Process:
Registration completed
Draft invoice generated
Administration: The administrator is responsible for sending the invoice. You can send it directly through Eduframe or mark it as "Sent" if handled externally.
Tracking: This method allows you to manually track the status of outstanding receivables.
3. Free
For courses, webinars, or events that do not have a cost, the "Free" option simplifies the checkout process.
How it works: The payment step is essentially skipped. The participant simply confirms their registration.
The benefit: It removes friction for the user, allowing for instant enrollment without the need for a checkout flow.
The Process: When these options are selected, the Payment section is hidden from the signup form.
Outcome: No invoice is generated in Eduframe for these registrations
4. TBD (To Be Determined)
This is a "placeholder" status used when the final payment details or methods aren't finalized at the moment of enrollment.
How it works: It allows a participant to register for a course while the final cost or billing method is still being calculated or approved (for example, in the case of custom quotes or internal company approvals).
The benefit: It ensures the participant's spot is reserved in the system while the administrative or financial details are ironed out later.
The Process: When these options are selected, the Payment section is hidden from the signup form.
Outcome: No invoice is generated in Eduframe for these registrations.
How do the Payments Methods work?
Eduframe offers a flexible financial workflow designed to automate enrollment while giving administrators full control over invoicing and payment tracking.
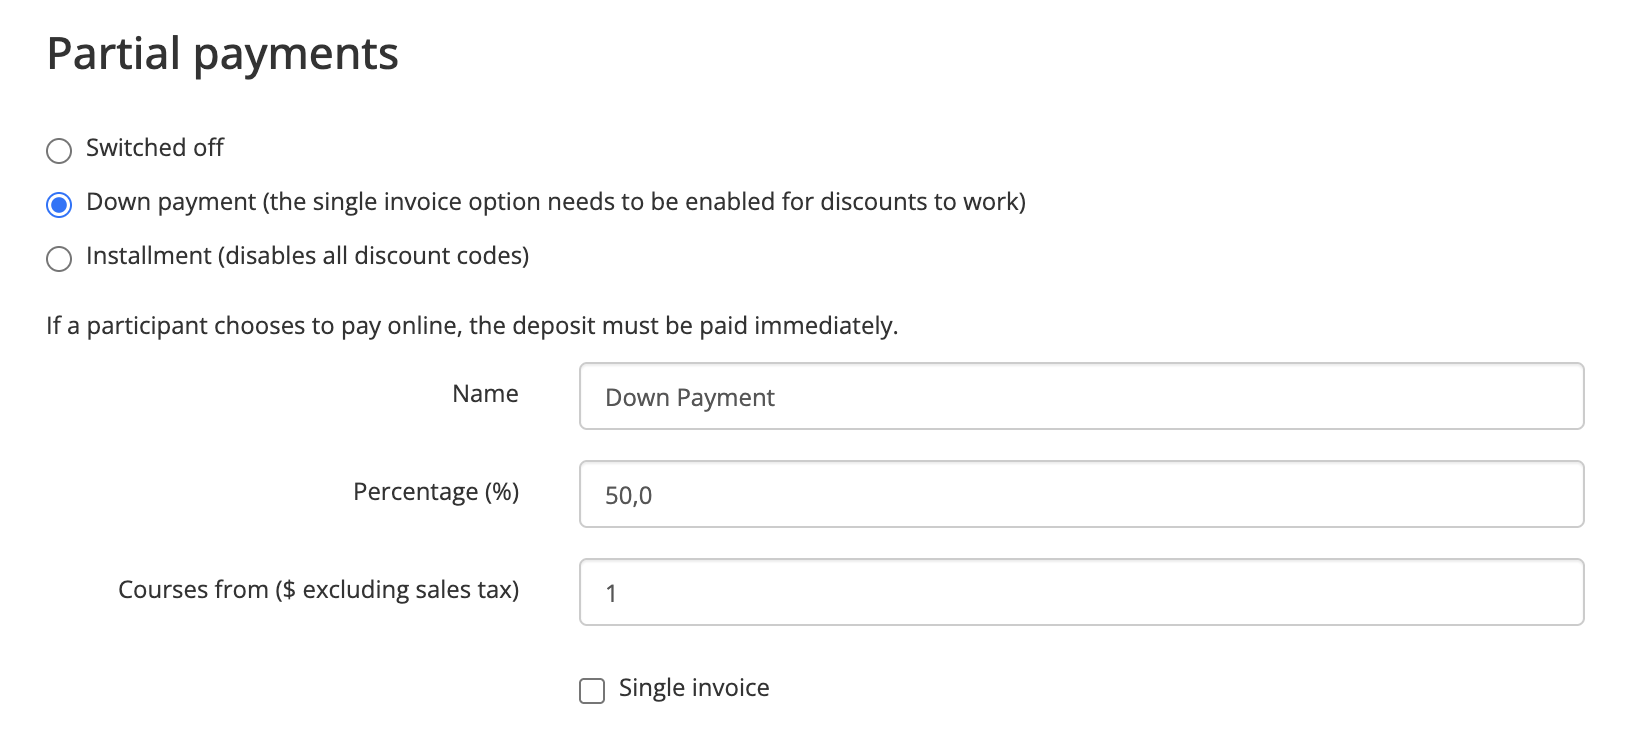
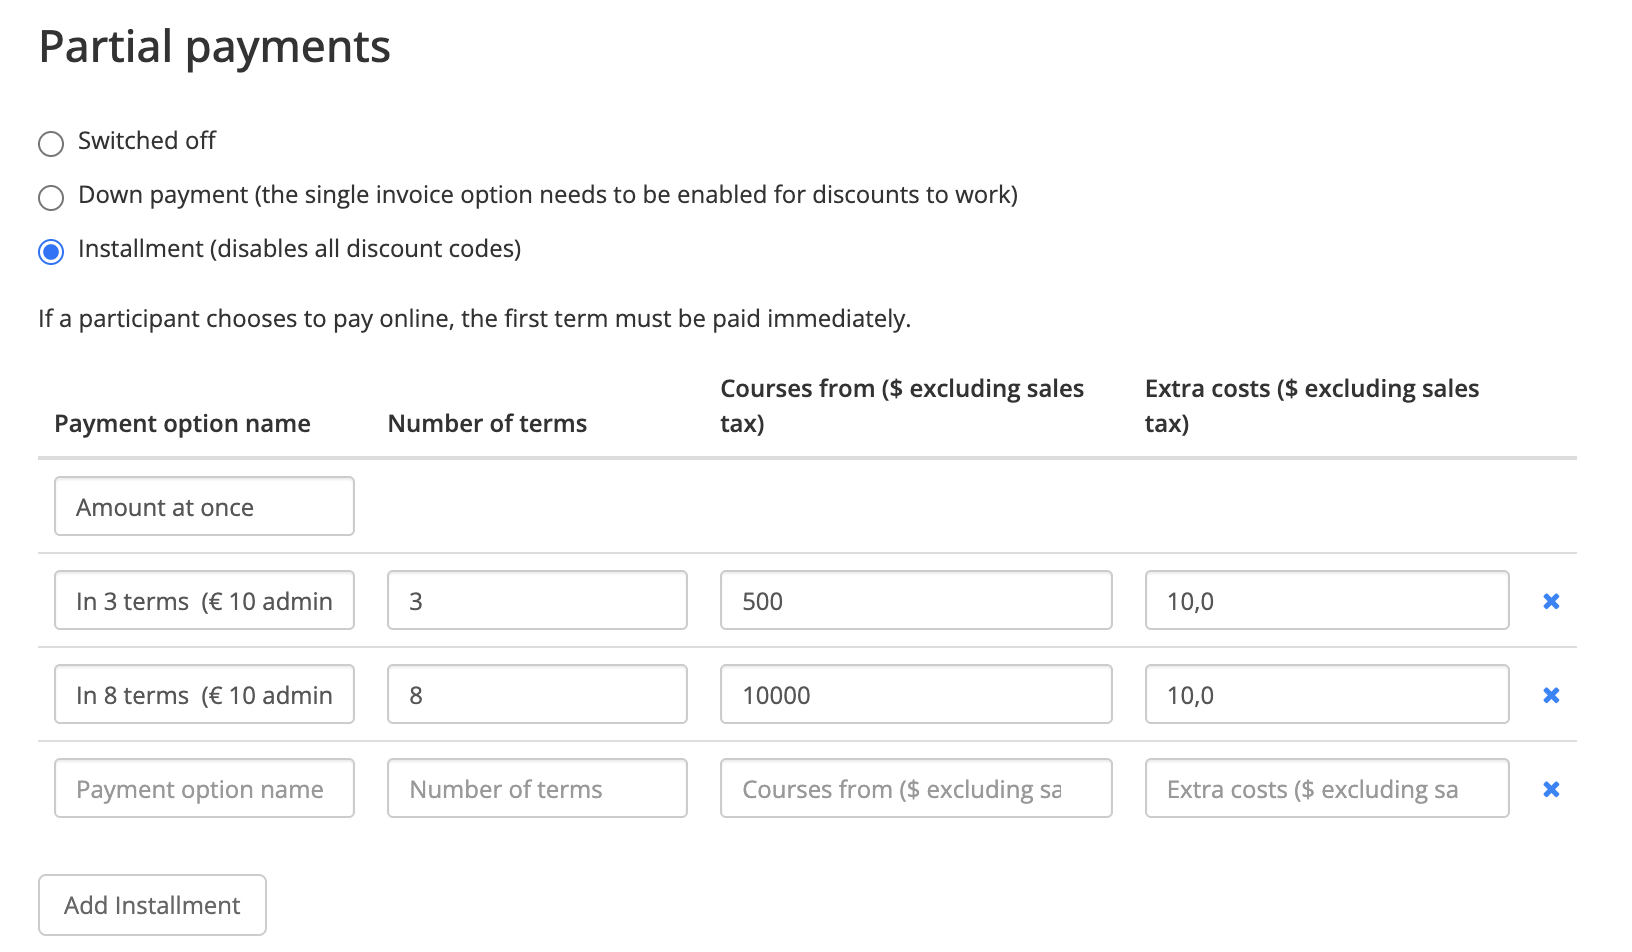
You can define how the total amount is split and billed to the customer: pay the full amount (so no partial payments enabled), Installments (payment in terms) or Down Payments. All details are described in 📄 Payment Options.
How can I send payment links?
There are two primary ways to provide a participant with a link to pay:
Via Sign-up: The link is presented immediately after the participant completes the registration form.
Via Invoices: An administrator can generate and send a payment link directly from the specific invoice record within the Eduframe dashboard.
More information can be found in 📄 Invoicing.
How can I track the payment?
To maintain a clear audit trail, you can always verify the chosen payment flow and billing method directly on the Order page. This ensures that support and finance teams can see exactly how a participant intended to pay and what steps remain.